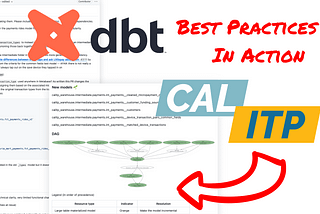
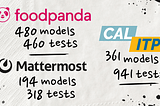
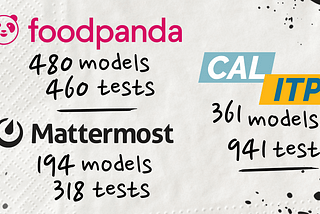
PinnedDave Flynndbt best practices in action at Cal-ITP’s data-infra projectCal-ITP uses a standardized PR template and automated report for comprehensive PR review. See their process in-action with example PRs8 min read·Apr 18, 2024----
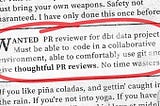
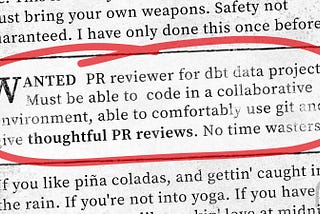
Dave Flynn‘Thoughtful PR Review’ is now a requirement for data jobsPR review is the ‘ Point of no Return’ — The last checkpoint before code is merged and prod data is changed. How do you review yours?5 min read·5 days ago----
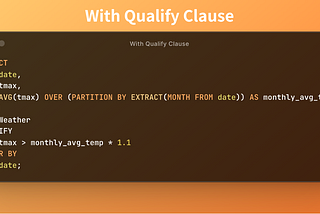
DouenergyAnalytical SQL Tips Series —Qualify ClauseIn SQL, the QUALIFY clause is essential for filtering results from WINDOW functions, serving a similar purpose as the HAVING clause does…2 min read·Apr 19, 2024--1--1
Dave FlynnSo, you think you’ve got dbt test bloat?After a certain threshold, alert fatigue becomes an issue, especially when upstream issues trigger hundreds of downstream alerts5 min read·Apr 18, 2024----
DouenergyFrom Zero to dbt: How to Analyze and Build Data Models from Spotify’s Million Playlist DataPart 1: Analyze the 30GB json dataset with DuckDb and jq, then convert to Parquet to prep for dbt10 min read·Apr 12, 2024--3--3
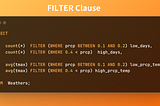
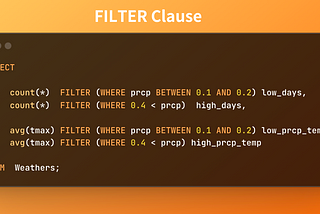
DouenergyAnalytical SQL Tips Series — Filter ClauseIn SQL there’s often more than one way to skin a cat, er… filter an aggregate. Here’s a SQL tip for those of you using DuckDB or Postgres2 min read·Apr 9, 2024----
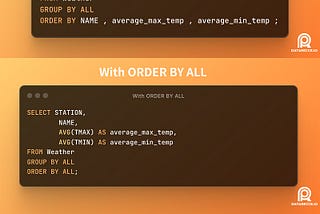
DouenergyAnalytical SQL Tips Series — ORDER BY ALLORDER BY ALL helps streamline the sorting process removing the need to manually specify which columns to sort by3 min read·Apr 3, 2024----
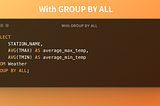
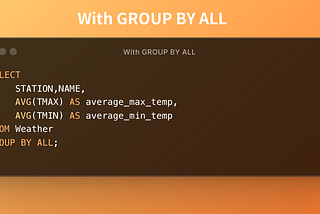
DouenergyAnalytical SQL Tips Series — GROUP BY ALLGoogle BigQuery has recently added support for a new syntax called GROUP BY ALL, find out how this makes SQL querying more convenient…2 min read·Mar 22, 2024----
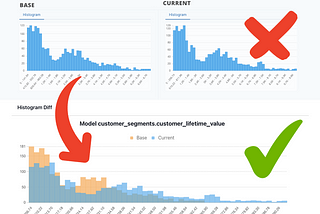
Dave FlynnHistogram overlay charts for data impact assessment in dbt just got a whole lot easierThe best way to diff data profile stats like histogram and top-k is to plot them on a single chart, overlaid with shared axes4 min read·Mar 20, 2024----
Dave FlynnWhen does proper data validation become a ‘must have’ for dbt projectsThere’s a threshold that’s crossed when proper data validation goes from something that’s ‘nice to have’, to something that’s a ‘must have’4 min read·Mar 18, 2024----